Moisture Detection in Merritt Island Coastal Homes: Step-by-Step Process Explained
Merritt Island homes deal with a different kind of water problem. It’s not always obvious flooding. It’s humidity, wind-driven rain, salt air, and systems that run hard most of the year. That combination creates the perfect setup for hidden moisture that slowly damages drywall, insulation, flooring, and framing before anyone sees a stain.
Moisture detection is the process of finding where water is, how far it has spread, and what’s causing it — without tearing your house apart “just to check.”
Here’s the step-by-step process that actually works for coastal homes in Merritt Island.
Know what you’re trying to prove
Moisture detection is not the same thing as “I see a wet spot.” The goal is to answer three questions:
- Where is moisture currently present (including hidden areas)?
- Where did it come from (leak, intrusion, condensation, or vapor)?
- Is it active right now or leftover from a past event?
Coastal homes can have multiple contributors at once, like a small roof intrusion plus AC condensation plus high indoor humidity.
Step 1: Start with a targeted history (fast but important)
A good inspection begins with context. Not a long interview. Just the details that change the search pattern:
- When did you first notice the issue (date and weather conditions)?
- Has it rained hard recently or been humid for weeks?
- Any AC drain backups, filter issues, or recent HVAC work?
- Any plumbing work, new appliances, or bathroom/kitchen remodels?
- Is the problem worse after storms, or worse when the AC runs?
In Merritt Island, “worse after storms” often points to exterior intrusion. “Worse when AC runs” often points to condensation, duct sweating, or drain line issues.
Step 2: Visual inspection (but done like a detective)
This is where many people stop — and that’s why problems get missed.
A proper visual check looks for patterns, not just stains:
- Baseboard swelling or paint bubbling (often indicates wicking)
- Ceiling corner discoloration (can be attic moisture or roof intrusion)
- Musty odor zones (closets, exterior-wall rooms, AC closets)
- Rust at vents or on air handler components (condensation history)
- Warped flooring edges or hollow-sounding tile (subfloor or slab moisture)
Coastal homes frequently show “false dryness” — surfaces look fine while insulation behind them is saturated.
Step 3: Measure indoor humidity and dew point
This step is non-negotiable in coastal zones.
High humidity can create moisture problems without a leak. A hygrometer reading gives you:
- Relative humidity (RH)
- Temperature
- Dew point (the big one)
If surfaces (vents, ducts, supply grilles, refrigerant lines) are colder than the dew point, condensation will form. That’s how you get moisture damage with “no leak.”
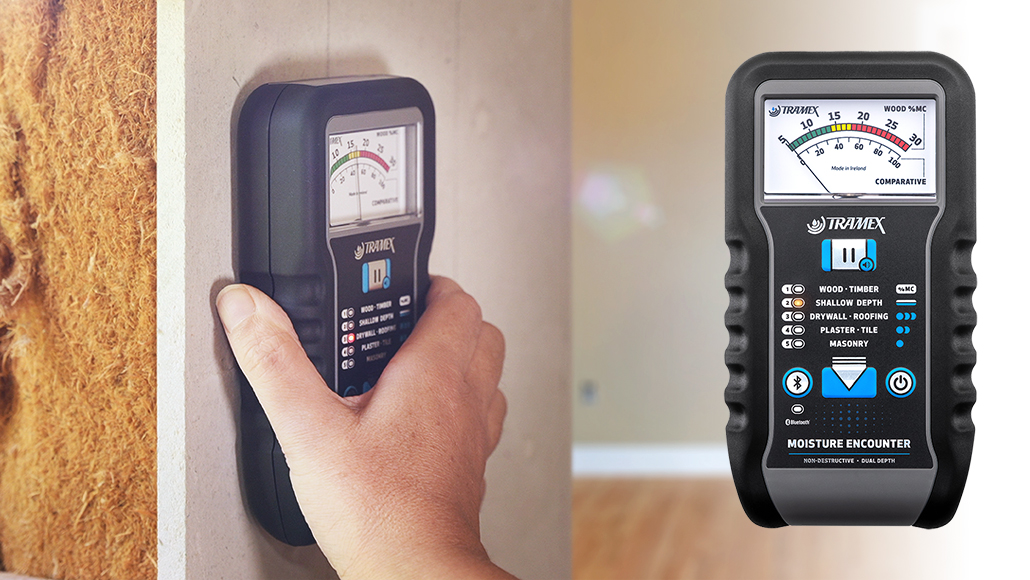
Step 4: Moisture meter scan (mapping, not spot-checking)
Professional moisture detection relies on mapping. You don’t check one point. You create a moisture profile.
Two common meter types are used:
- Non-invasive meter: fast scanning to locate suspect zones
- Pin meter: confirms moisture content inside wood/drywall and helps quantify severity
The key is comparing:
- Wet vs. dry reference areas in the same home
- Interior walls vs. exterior walls
- High points vs. low points (gravity and wicking tell stories)
In Merritt Island homes, exterior-facing walls, window corners, and AC closet adjacent walls are frequent “hot zones.”
Step 5: Thermal imaging (used correctly)
Infrared cameras don’t “see water.” They show temperature differences. Moisture often creates a cooler pattern because evaporation changes surface temperature.
Thermal imaging helps:
- Identify the shape of spread (gravity trail vs. wide bloom)
- Locate moisture behind finishes without immediate demolition
- Confirm whether the pattern matches plumbing, roof, or condensation behavior
Important detail: thermal images must be verified with a moisture meter. Otherwise, you can confuse moisture with insulation gaps or airflow drafts.
Step 6: Pinpoint likely source category
Once moisture is mapped, the next step is categorizing the cause. In coastal Merritt Island homes, the most common categories are:
Plumbing leaks
Usually localized, often near kitchens, bathrooms, laundry areas, or slab lines. Patterns can travel, but the origin typically correlates with plumbing routes.
Roof/exterior intrusion
More common after storms. Often appears around windows, sliders, roof penetrations, chimney/vent flashing, or wall seams. Wind-driven rain makes this tricky because water can enter higher and show lower.
AC and duct condensation
Very common. Look for moisture around supply vents, inside AC closets, along refrigerant line runs, and at return plenums. Duct sweating in hot attics is a classic coastal issue.
Vapor drive and slab moisture
Concrete slabs can release moisture upward, especially after heavy rains and long humid stretches. Flooring problems often show first: loose tile, warped engineered wood, or persistent musty odor at baseboards.
Step 7: Check the HVAC system and ducts (coastal homes love to hide problems here)
In many “mystery moisture” cases, the culprit is HVAC-related.
A proper check includes:
- Drain pan condition and rust
- Condensate line slope, clogs, and overflow history
- Signs of past float switch trips (or absence of safety switch)
- Insulation on refrigerant lines (missing or deteriorated = sweating)
- Attic duct insulation condition and duct joint sealing
- Return air leaks that pull humid attic air into the system
If your AC is oversized and short-cycling, the house can feel cool but still be humid — and that humidity becomes “indoor moisture damage” over time.
Step 8: Decide whether limited access openings are needed
Sometimes the data points to a hidden cavity that must be confirmed. The best practice is minimal, targeted access:
- Small inspection holes behind baseboards
- Limited drywall openings in the highest-probability area
- Borescope (camera) inspections when appropriate
This is how you avoid unnecessary demolition while still confirming what’s happening inside walls or ceilings.
Step 9: Document readings and create a moisture map
For homeowners, landlords, and property managers, documentation matters. A useful report includes:
- Moisture readings with locations (not just “wet”)
- Humidity and temperature readings
- Thermal images paired with meter confirmation
- Likely source category and reasoning
- Recommended next steps (repair vs. drying vs. further testing)
This is what turns “we think” into “we know.”
Step 10: Define the next action based on what was found
Moisture detection isn’t the finish line. It tells you what to do next.
Typical outcomes:
- Active leak found → repair source first, then dry
- Intrusion pattern found → exterior sealing/flashing repairs, then dry
- Condensation issue found → HVAC drainage/airflow/insulation corrections
- High humidity issue found → dehumidification strategy + HVAC tuning
- Slab/vapor issue found → moisture mitigation and flooring strategy
The biggest mistake is reversing the order: repairing finishes before drying and source correction. That’s how stains come back and odors never leave.
What to watch for specifically in Merritt Island coastal homes
If you want the “don’t miss these” list:
- Window and slider corners after wind-driven rain
- AC closet walls and flooring (slow leaks, pan overflows)
- Attic duct sweating and crushed insulation
- Refrigerant line sweating inside wall chases
- Musty closets on exterior walls (low airflow + humidity)
- Flooring changes near exterior walls (slab moisture release)